Datasets
Click the Eye icon to view, add, and manage datasets
Click the Pencil icon to edit the connection for a dataset
Click the Map icon to create a test ticket to validate the dataset connection
Click the Trashcan icon to delete a dataset
View Datasets
To view and manage the datasets associated with a Data Provider, click the Eye action icon next to the data provider’s name. When first created, Data Providers have no datasets.

No Datasets have been added
Add Dataset - Quick Add
- To add the first dataset, select New Dataset and enter the name and URL of your dataset. ESRIJSON and WFS are supported. Use a ‘WFS:’ prefix before WFS dataset urls. ESRIJSON sources should start with ‘ESRIJSON:’.
Name
Credential: No authentication required
Source dataset (the URL for the source ESRI or WFS)
Click Submit to add the dataset.
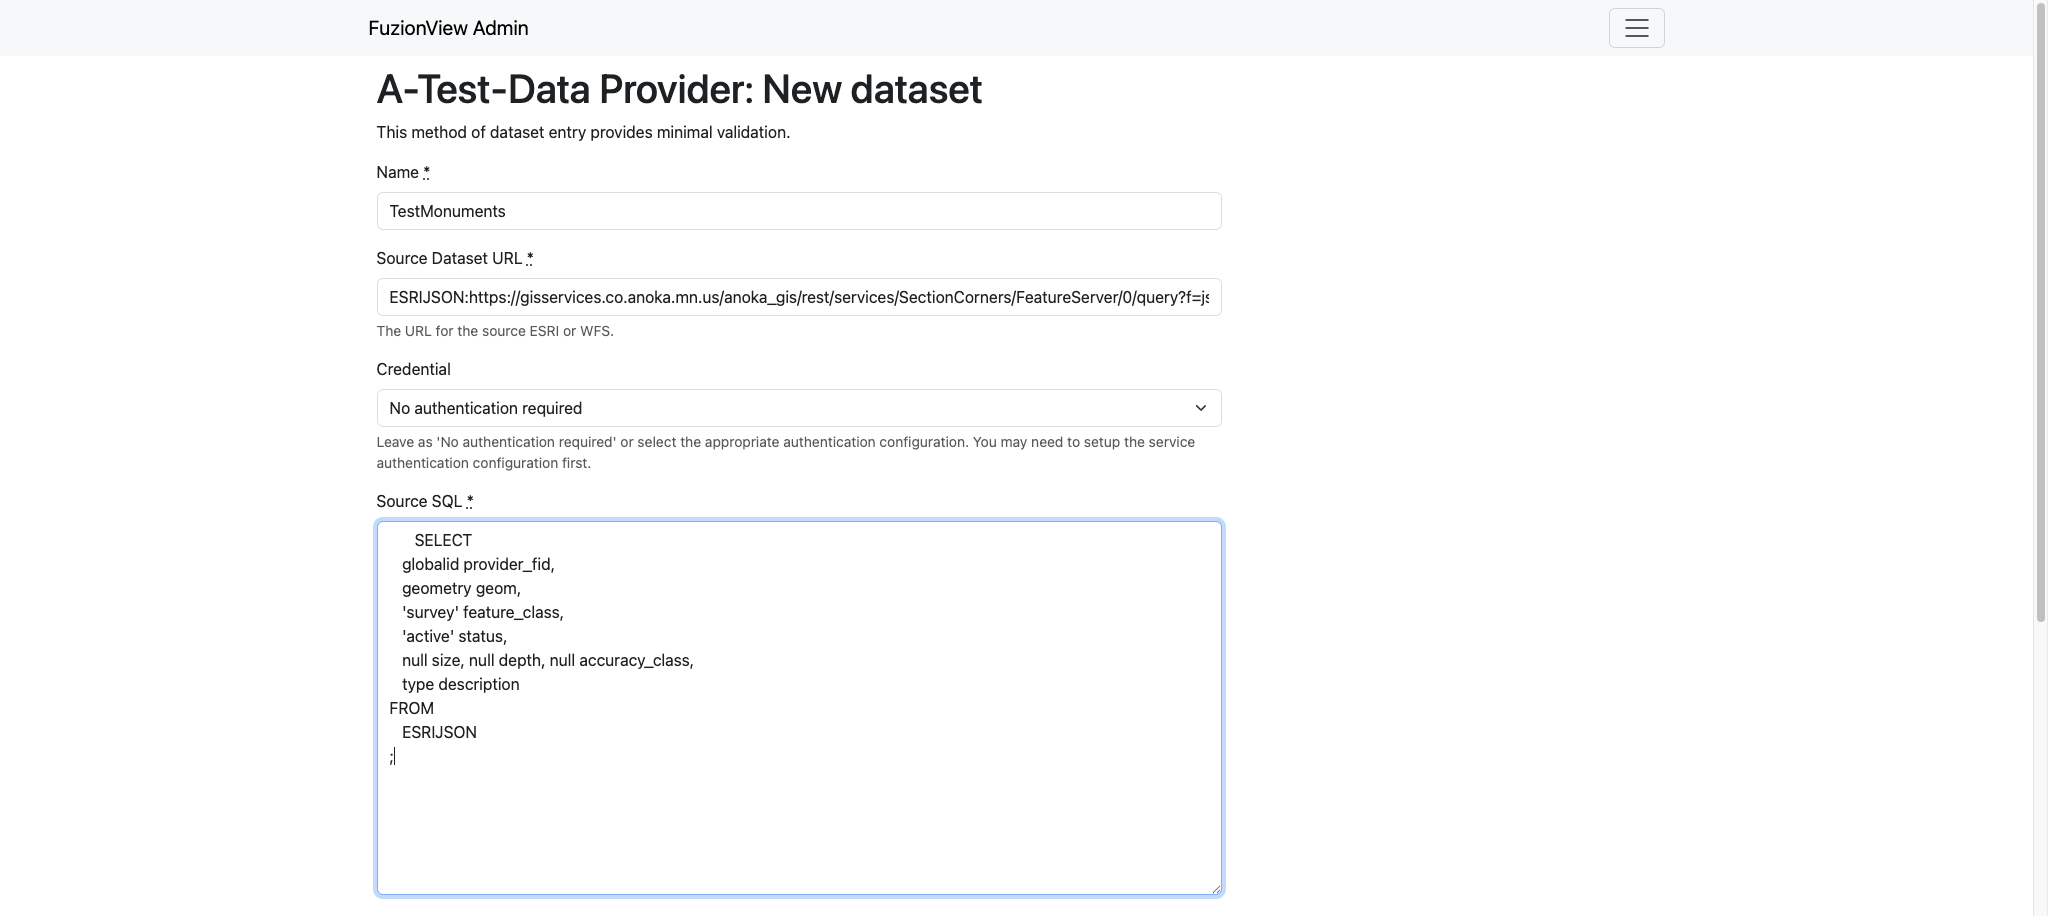
Add New Dataset
Add Dataset - Basic Entry
- Some datasets can be entered with minimal validation. Click the option for Basic dataset entry and add the information needed to connect to your dataset:
Name
Source dataset URL: external link to an externally managed and hosted dataset.
Source SQL: command line options that can be passed to gDal.
Source CO: describes how the source dataset is stored.
Cache the whole dataset: When enabled, operates against the local copy, a good choice for datasets that change infrequently.
Enable the dataset: On by default.
Source SRS: the EPSG code for the coordinate system in use.
Click Submit to add the dataset.
Note
When the dataset is not enabled, the data is only visible in test tickets to validate the dataset.
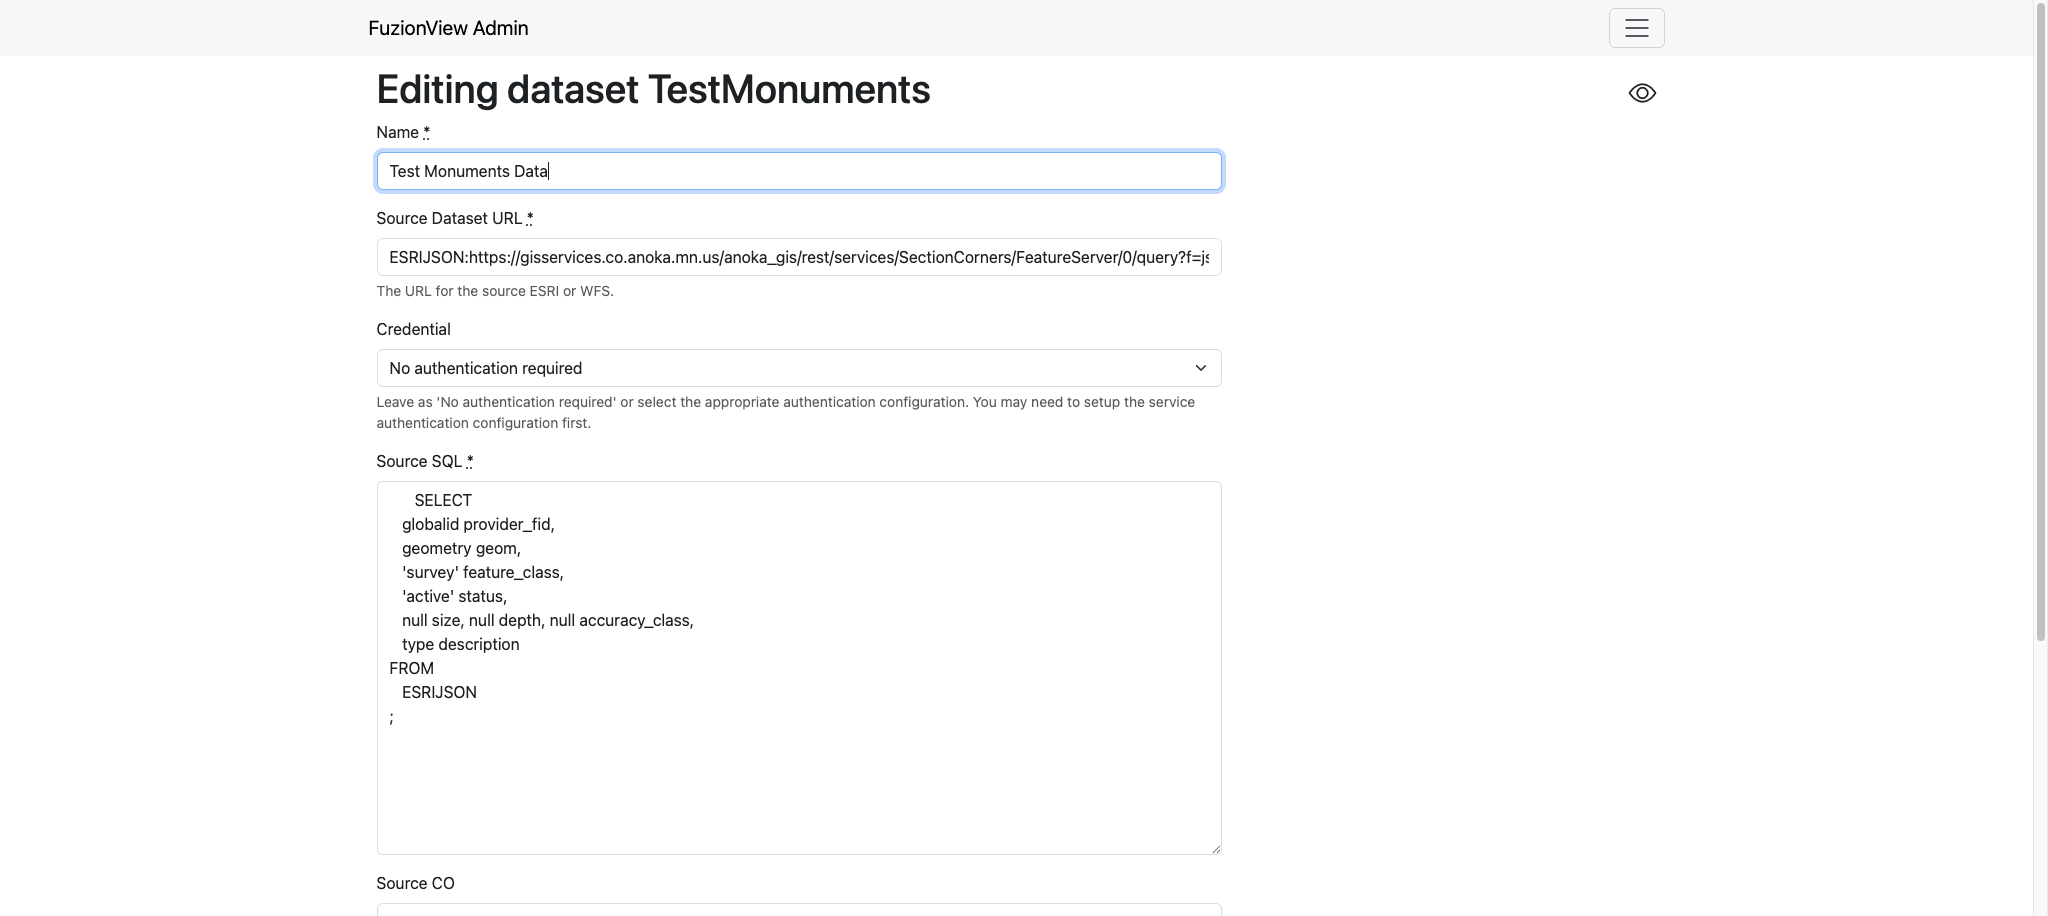
Add New Dataset
Manage Datasets
Select the icon next to a dataset to View, Edit, or Delete it.

View, Edit, or Delete Dataset

View, Edit, or Delete Dataset
Warning
When a dataset is modified, the original data will remain in the system until related tickets expire.
Test Ticket
- Select the map action icon next to a dataset to create a test ticket. Use the test ticket to validate that your dataset connection is successful.
Select a Data Provider
Select a Dataset
Click the Map icon
Use the Zoom icons to find a test ticket location
Select the Polygon tool icon and draw the ticket boundary
Click Submit
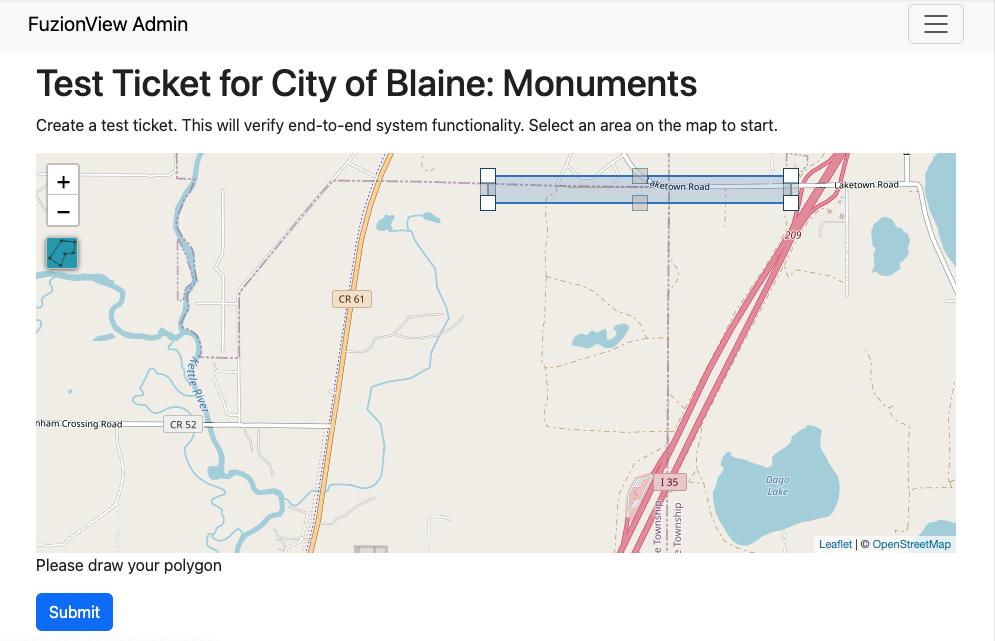
Create Test Ticket
A Pending status message is displayed. It may take up to 5 minutes for the available feature data to populate.
Once the ticket has been created, the status will update to successful.
Click the Test Ticket link to view the feature data and confirm configuration was successful.
Note
The test ticket is available in the system to any authorized dataset user. The ticket exists for only 24 hours and will be automatically deleted.
Warning
If you select a ticket boundary outside the service area, an error message will be displayed.
Service Area
Data providers can define a service area, which allows FuzionView to optimize service requests.
Select the option to Define a Service Area to draw the service area.
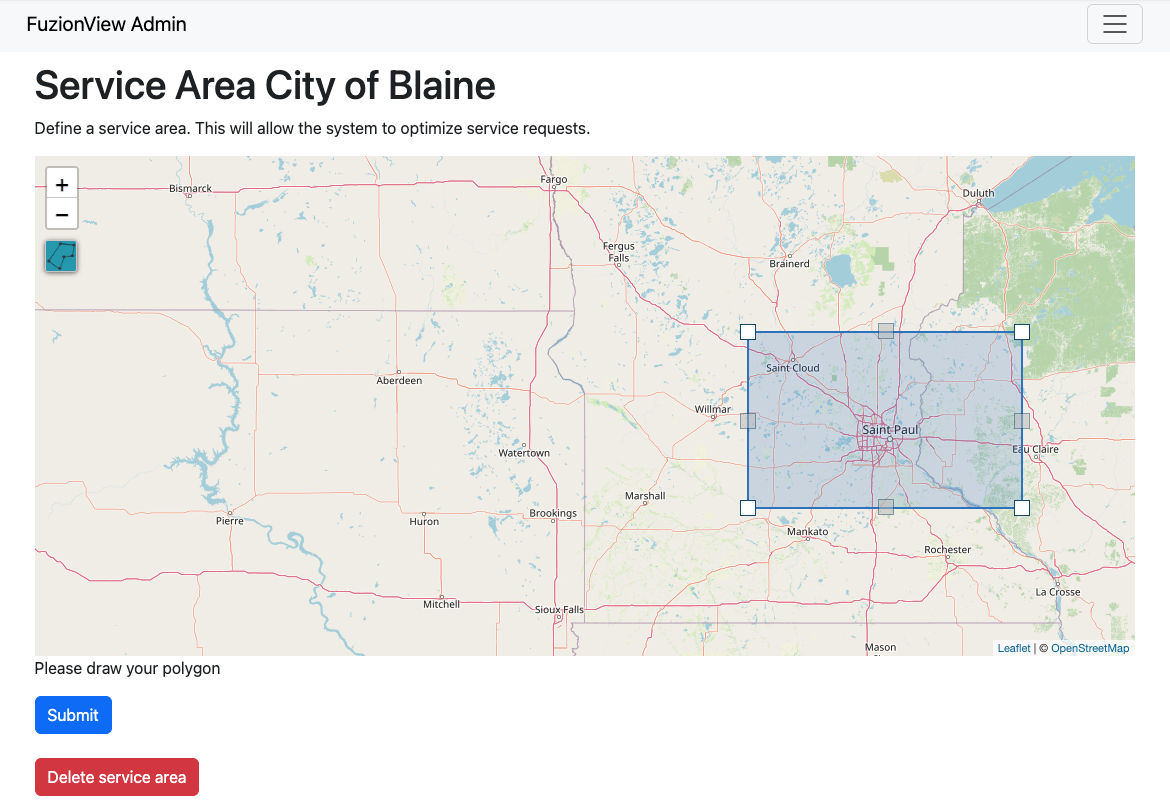
Define a Service Area
Use the + icon to zoom into the correct location. Select the Polygon icon on the left and draw a simple shape around the desired area. Use the points in the middle of each line to adjust the shape until it defines your service area as closely as possible.
Click the Submit button to save. A message will display indicating that the service area has been set.
Delete Service Area
If the service area changes, simply delete the existing service area and create a new one. A confirmation will be displayed. Click OK to remove the service area.
Service Authentication
- Set up a service authentication configuration for datasets that require authentication. The authentication types are:
HTTP Basic Authentication
ESRI Portal Token
OAuth 2.0 Client Credentials grant
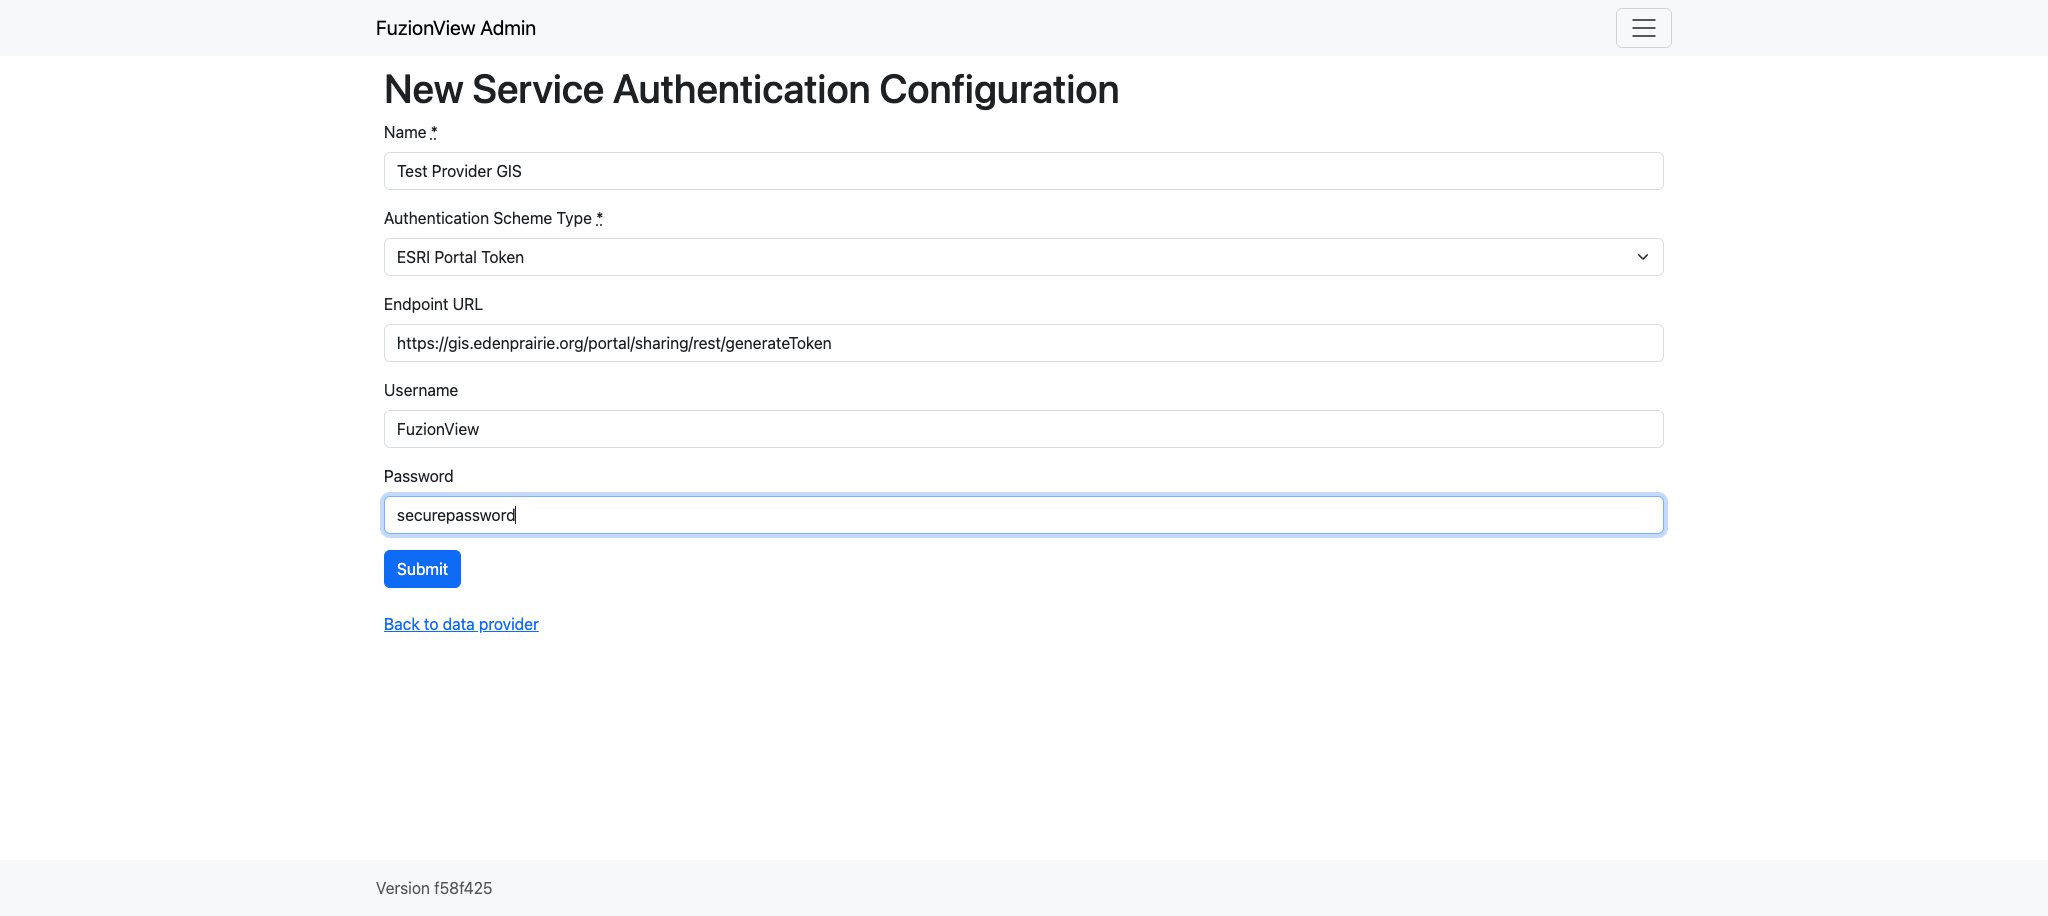
Define an Authentication Configuration
Last Updated: Apr 19, 2026